Caring for Chicks / Ducklings from Day One to Independence
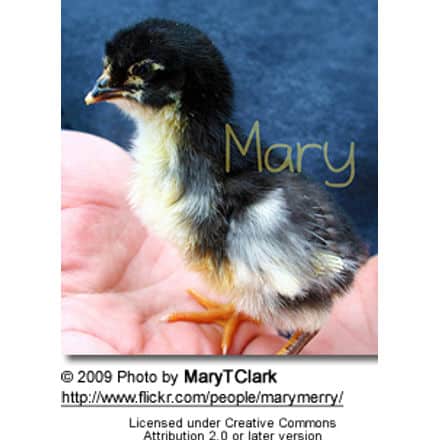
At the time of hatching, chicks / ducklings range in development from helpless to independent, depending on the species. Helpless chicks tend to be born small, blind, immobile and naked (for example parrot chicks). On the other hand, poultry chicks (amongst others) are fully mobile and feathered upon hatching.
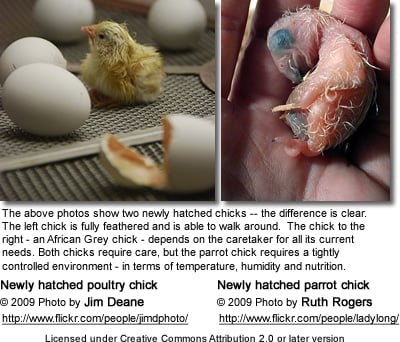
Those chicks born naked and helpless require a precisely regulated environment in terms of temperature and must be brooded for longer than those born feathered and mobile. They can’t feed themselves and need to be handfed. Every aspect of their lives needs to be monitored. Please refer to this webpage for detailed care requirements and problems you may experience.
The below refers mostly to the care of poultry chicks – although some information applies to exotic birds as well.
Useful Information: Breeders’ Resources (covers everything from handfeeding to potential breeding / chick problems) … Incubation Information
Relevant Tools / Products: Egg Candling Devices … Full-spectrum Lights … Nesting Boxes … Feeding Formulas and Feeding Utensils … Need Eggs? Suppliers of Hatching Eggs (many will ship!) for a listing of egg suppliers in the United States and United Kingdom
Incubating Eggs & Raising Chicks / Ducklings:
Raising chicks / ducklings is far less challenging than taking care of helpless parrot chicks. All you have to do is keep the chicks warm, dry, and protected from predators, as well as providing needed nutrition (food and water). Unlike their exotic counter parts, which are completely helpless for the first weeks, newly hatched POULTRY chicks can scamper about soon after hatching. They can see quite well and are able to eat and drink on their own. However, it’s a good idea to dip the chicks’ beaks in their water and feed to introduce them to their food and water sources.
Keep in mind that even the relatively independent poultry chicks require tending to at least 5 times a day. Their litter needs to be changed, their food and water dishes may need to be cleaned and topped off several times a day.
The most important aspect of raising chicks is to provide them with a suitable environment. You will need an appropriate brooder placed in a predator-proof and draft-proof environment. If you decide to keep the brooder in the living area, do keep in mind that baby chicks like to “scratch” their bedding materials, which – depending on the litter you use — may create a fine dust that gets everywhere. Baby chicks also do smell — if kept clean (as they should), the smell isn’t overwhelming – still you may not want to have the brooder right in your living room. Usually a spare bedroom works well. The danger of dogs and cats to chicks is obvious — so if you have other pets in the house, special care needs to be taken to keep them separated from the chicks.
I
- Instructions for setting up a brooder, including finding a suitable sizes, temperature requirements and any other aspect needed to keep the chicks comfortable and healthy.
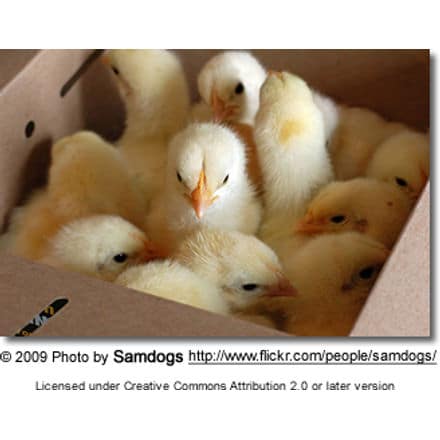
Immediately after hatching, up to the first week:
For the first 4 or 5 days put the chicks on a “grippable” surface; for example paper towel, hardware cloth or burlap work well. Such a surface allows chicks to learn to walk without their legs slipping sideways, which could lead to splayed legs, slipped tendons and other leg deformities.
Having a layer of feed on the brooder floor, will allow the chicks to scratch around in it for the first few days giving them a good nutritional start and this way they don’t eat too much litter.
Although chicks don’t need feed or water for the first 48 hours after hatching, both are usually provided as soon as the chicks are transferred to the brooder.
After 4 to 5 days, chicks have lost their clumsiness and figured out where their food and water sources are — at this point you can spread some type of litter on the floor, about 2 to 4 inches deep. Shredded newspaper or some wood shavings work well for this purpose. More information on brooder set-up. Whatever you choose, it’s important to keep the litter clean and dry.
Feeding Ducklings / Goslings
Good commercially prepared duck feed is available from most local feed stores.
PLEASE do not be tempted to feed Weetabix or some other grain-based food. Chicks need PROTEIN to build strong bones and muscles.
If there is not sufficient protein in their diet, severe skeletal problems will result.
Feeding Poultry Chicks
Rapidly growing chicks must have a well-balanced starter diet for proper growth and development. Fortunately, formulated diets greatly facilitate that part. Suppliers have formulated special feed complete with everything baby chicks need. They are usually called “chick starter feed” or “chick starter mash” (referring to how it is ground). Use the appropriate starter feed for the species of bird that you are raising. Do keep in mind that if you have had your chicks vaccinated against Coccidiosis, they’ll need an un-medicated feed. If the chicks haven’t been vaccinated, discuss with the breeder whether or not a medicated feed is recommended.
One obvious question is when to switch the chicks from a “starter feed” to a “chick grower” feed. That depends on the formulation of the feed. Instructions should be given on the bag. Some manufacturers recommend feeding the starter mash for 4 weeks before moving onto grower; others suggest mixing both together in a “starter/grower” feed for up to 20 weeks. For example, Purina Start and Grow chick feed can be fed from hatch to lay (the age when females are able to lay) – 18-20 weeks.
Some mix in tiny pieces of dark green lettuce, little pieces of grapes or apple, small pieces of bean sprouts and alfalfa sprouts; or add dry baby cereal from the supermarket (such as barley, oat, wheat, rice). However, I prefer to offer those in a separate dish as they will grow bacteria that would contaminate the dry food. But if the feed dish is cleaned and the food is changed often enough, that really doesn’t much matter.
Some will also feed their chicks worms and other bugs from the garden. Chicks will most certainly enjoy some veggies, dairy foods and even bugs / warms — but consider these the occasional snack and your starter or grower feed the main food, as they are nutritionally formulated to provide a complete diet. Watering it down may throw off the chicks’ nutritional balance.
If no formulated diets are available, mashed, hard-cooked egg or finely crushed breakfast cereal for a few days. Adding tiny pieces of greens / veggies / fruits / worms / sprouts (refer to above) will allow for a more varied nutrition and can be used to raise chicks if you don’t have access to commercial mixes.
Another important question may be how much to feed. The chicks should have access to food at all times — they will eat when they are hungry. Their food should not be rationed.
Grit: Chicks don’t have teeth, yet still need to grind up their food. In nature, they will eat tiny pebbles and store them in their crop. As the food enters the crop, the pebbles grind the food up to facilitate digestion. For baby chicks, sand, parakeet gravel or canary gravel, available at your local pet store or grocery store pet aisle, will suffice. You can either sprinkle it over their feed or provide it in a small cup or bowl.
Dish to use:
The bigger the chicks get the larger feeder you will need.
One could feasibly use any dish, bowl, box or tray for feeding the chicks; HOWEVER, the downside is that this gets very messy as the chicks will jump in and kick the feed all over the place. They will poop in it and, in some cases, the dishes flipped over trapping the chick underneath.
Chick feeders are generally inexpensive and will save you lots of work and potentially prevent the death of a chick.
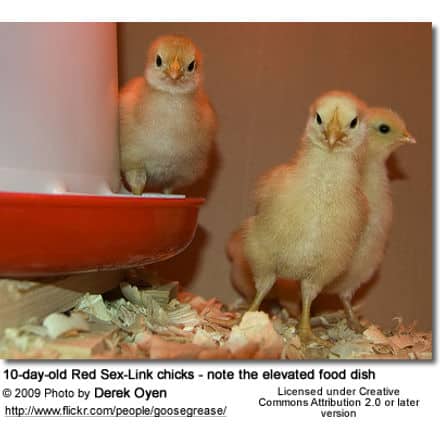
Drinking
Water dishes pose a considerable danger for chicks as they easily drown in water dishes. At the very least they will spill the water and wet down their nesting material potentially causing them to get chilled. They will also walk and poop in the water dish, which can lead to bacterial infections.
It will require constant changing and clean-up. Water should be at least changed twice a day — more frequently, if necessary, to keep the water clean and fresh. Clean the waterer each time you make the change, and refill the dish with lukewarm water. The addition of vitamins and electrolytes to the chick’s water will help them get off to a better start (again, I would check what they have available at the feed store that is appropriate for chicks).
As the chicks grow their water consumption increases and you will need to increase the size of the waterer. Initially the chicks will need a small water dish with marbles or small pebbles placed in it to prevent chicks from drowning in the dish. You could also use a saucer having an inverted cup placed over it. It is important to choose something that cannot be tipped over.
However, it is best to use an appropriate chick waterer. They come in a number of different sizes and shapes. You can buy plastic or metal watering basins that fit onto mason jars.
Having a good water feeder will cut down on the clean-up required, although even with the best water feeder, the chicks will still manage to kick bedding materials into it or find other find ways to soil it. So periodic checking and cleaning of water dish is important.
Once the chicks are 1 to 2 weeks old, you can raise the waterer off the ground – which will help keep the water clean longer.
Do keep in mind, water is vital to the chick’s existence, but being wet is detrimental to its health.
The chicks and their environment should be kept clean and dry. They should have access to fresh, clean water at all times.

What to expect
The chicks will spend a lot of time sleeping. Often one can observe them lying on the floor with their heads down and wings spread out.
Healthy and comfortable chicks make contented peeps; they will pursue their normal activities of walking around, pecking at the food, pecking at the sides of the box, drinking water, and sleeping. Cold, hungry or otherwise distressed chicks may cheep loudly and insistently.
If your chicks show signs of rear end “pasting up” gently wash the area with a cloth or cotton ball dampened with warm water. As the chicks start to grow this condition will disappear.
Chicks should be kept inside for about four to six weeks. On warm days, you can put them outside for a little while when they are younger — however, never leave them alone. Cats will not normally bother an adult chicken but they will go after a chick. The vulnerable chicks are also easy targets for dogs, raccoons, possums, foxes, weasels and birds of prey.
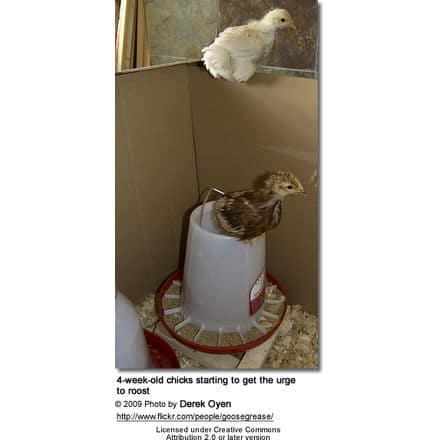
At about four to six weeks the chicks have most of their feathers and can go outside permanently – provided they have a predator-proof enclosure and a roosting place. Chicken start perching when they are about a month to 6 weeks old.
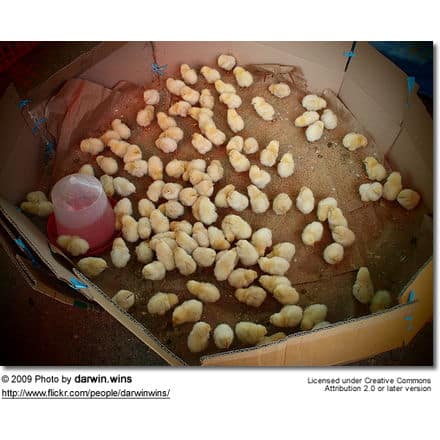
Information on Housing Chicks, Temperature Requirements, etc.

